Guide to Painting a Wall Mural (Kid’s room)
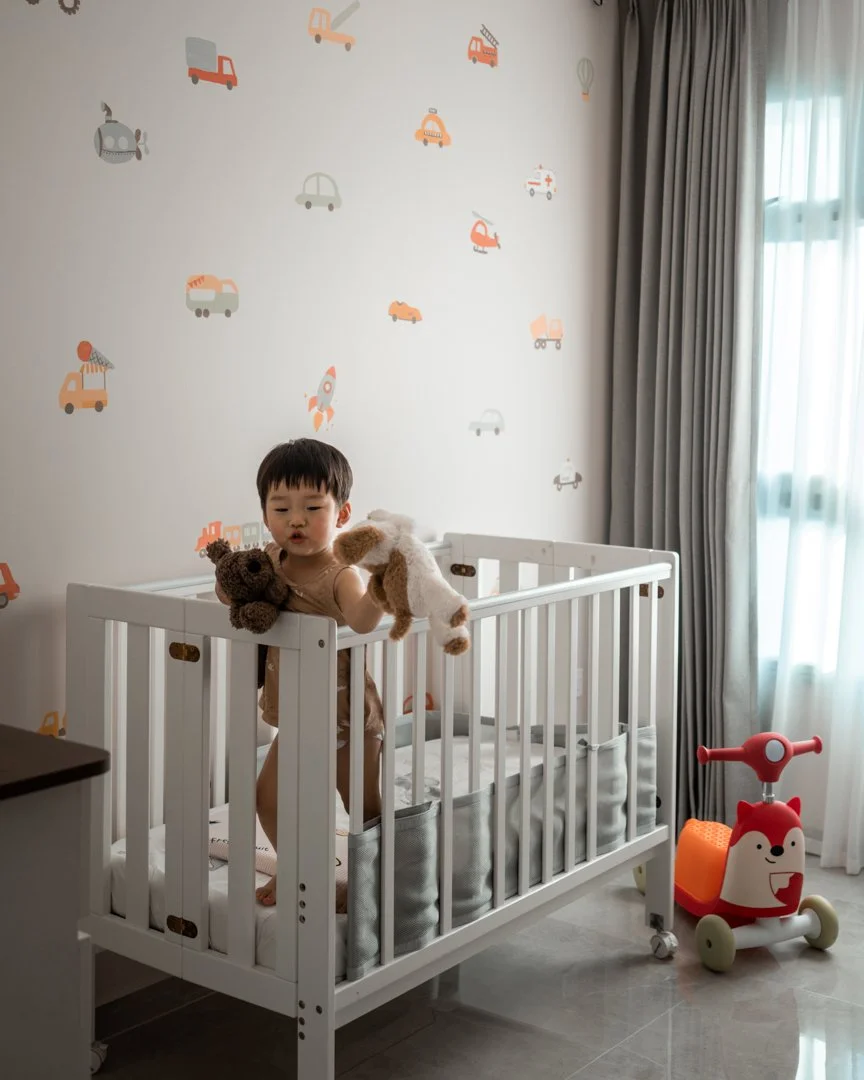
I’ve been wanting to paint a mural for Evan’s room for the longest time! Now that he’s nearly 2, it finally happened! He’s totally into vehicles right now, so I went with cars, trucks, trains and planes. Simple shapes, lots of colour, and 100% mama love went into this little corner of his world.
I prefer painting over wall decals because it feels more personal, lasts longer (trust me!), and you can really customise it to your space. If you’re thinking of painting your little one’s corner, or any room really, here are some tips I hope you’ll find useful!
Pick your palette.
Start with a few colours you really love. Below are the Nippon Paint colours I worked with. For a minimalist look, shortlist 3-6 colours only.
Start by choosing the colours you know you’ll need. For me, that would be a yellow taxi and a coral red fire engine. From there, pick supporting shades that work well with them. I skipped black since it felt too harsh for the mural, and used a grey instead for the vehicles’ wheels.

Old Stucco NPN 3224T, Sherlock’s Cap NPN 3094P, Love Birds NPR 2361D, Treetop Walk NP BFF 2633P, Orangelicious NPTO 2461D, Mango Crush NPYO 2460P
2. Plan your layout.
If you’re going for a pattern mural like mine, try spacing out your elements evenly. It might be good to sketch with a pencil, but I skipped this to avoid eraser marks.

3. Layer your colours.
My watercolour habit really carried over here. I always start with lighter shades first, as they can be painted over with a darker shade if I made a mistake or didn’t like how it look.
4. Tip: Work by colour, not by object!
Instead of finishing one element at a time, paint all the areas in the same colour first. For example, I laid down all the yellow bases in one go. This way, while waiting for this base layer to dry, I could move on to something else. Be patient, never paint over a layer that hasn’t dried. You’ll thank yourself later!
5. Balance your colours.
To avoid clusters that feel heavy, avoid placings the same colours side by side. For instance, if you’ve got a yellow taxi, try putting a red fire engine or green airplane adjacent to it, instead of another yellow bus.

6. Consider negative spaces
Leaving areas like windows or the inside of wheels unpainted helps define the shapes. It also saved me the extra step of filling them with the wall colour afterward.

7. Balancing simplicity and detail
For each element, I kept it simple at first with just two colours. But I soon felt limited and couldn’t resist adding more details. Luckily, it still worked out since I only worked within my chosen palette.
Most importantly, I had so much fun creating this, and I hope you do too! This mural is such a personal piece (for my son!), and at the end of the day, I knew he would love it no matter what I painted!